Quick Installation Guide
The CubicMeter can be installed in any position or angle, including vertically on an incoming pipe or with the display facing down, such as in a ceiling.
💡Consider the pipe direction the CubicMeter will be mounted on. If air is trapped in the pipe, it can disrupt accurate flow measurements and cause operational issues.
You will need a flathead screwdriver for the installation (not included in the package contents)
Installation Video
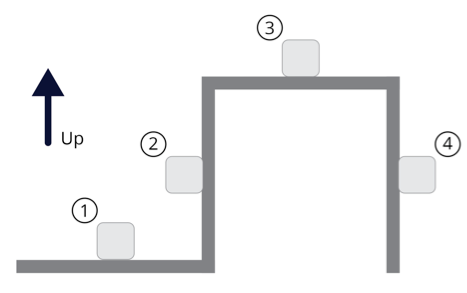
Find the pipe position
IMPORTANT: Make sure that the water pipes are damaged or distorted and do not contain air bubbles.
1: Acceptable position
2: Acceptable position
3: Not recommended, air build-up may occur
4: Acceptable position
The device may be rotated vertically around the pipe if needed.
If the installation is not made correctly, Quandify cannot guarantee metering accuracy.
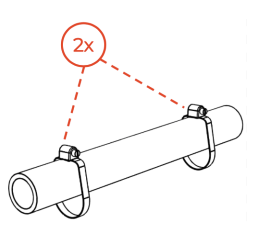
Attach the two pipe clamps around the pipe so that they hang freely on the pipe
NOTE: Do not use plastic hose clamps or zip-ties! Only use the pipe clamps provided in the packaging.
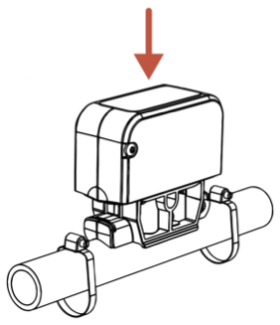
Place the CubicMeter between the two clamps, with the flow arrow in the same direction as the flow direction
NOTE: Do not turn/move the unit after the clamps have been engaged, as it will damage the unit.
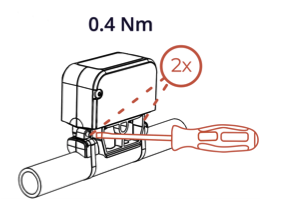
Slide the pipe clamps into their designated areas on the CubicMeter and tighten with a flathead screwdriver.
NOTE: Do not over-tighten.
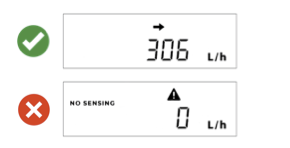
Check the device display to ensure accurate measurement by running water for a minimum of 60 seconds.
Check to make sure that the water flow direction is correct.
If 'no sensing' text appears on the display, recheck previous steps or refer to our No Sensing Errors guide.
NOTE: If the meter has been activated for more than 1 hour, it will show total water usage in m3.
Ready to start collecting data?
Guides for our connectivity options can be found in there respective folders:

